Understanding Aperture, Shutter Speed, Depth of Field,
and Shooting in Manual Mode
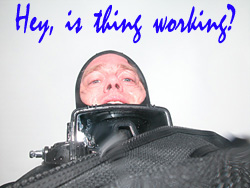
Words and images by Ken Ashman. Copyright © 2005 - 2019.
Let's face it, underwater photography isn't exactly easy. The art of photography is all about painting with light - learning to use light to "paint" our frame and create the image we see in our mind's eye. To do it we need to know how camera settings control our image outcomes. My purpose in this essay is to cover the basics, and help you grow your knowledge and skills.
Aperture (F-stop) controls how wide your camera's "eye" opens.
Shutter speed controls how long it stays open.
Understanding how to use aperture and shutter speed settings to your advantage will make you a better photographer.
In the simplest terms, aperture and shutter speed settings are quantified as numbers. A lower number means more light will reach your camera's sensor. A higher number means less light in your image. (The numbers are followed by "th" - i.e. 60th of a second, 125th of a second, etc.) Using aperture and shutter speed effectively gives you a high degree of control over your photographic outcomes.
Let's start with shutter speed.
If you cut the amount of time your camera's eye is open by half, you will get half the amount of ambient light in your image.
Changing shutter speed will affect the "ambient" areas of your frame (sunlight, video lights, flashlights - the areas not lit by your strobes.) "Speeding up" the shutter (less open time = faster speed) will cause these areas to go darker. The faster the shutter, the darker these portions become.
The amount of light you get in the image from your strobe is not affected by shutter speed, because a strobe flashes for only a scant fraction of a second. Changing the shutter speed won't change how much strobe light appears in your image.

In this image at right of the Blackbar Soldierfish Myripristis jacobus, the contrast between the subject and dark background helps the fish stand out dramatically in the frame. These fish hide in the dark crevices so my idea was to create that feeling. The background is lit with a combination of strobe light and ambient. This shot was a D200 with 60mm Nikkor Micro lens (90mm equiv.) at F18, shutter set at 125th, ISO 100.
Next, let's talk about aperture settings.
A smaller aperture number means more light will get to the sensor. A higher number is the inverse. Unlike shutter speed, adjusting the aperture will affect ALL of the light in your frame, strobe and ambient light alike.
Your camera's aperture works like a valve on a water faucet. The amount of water is analogous to the amount of light. The wider you open the aperture valve, the greater the amount of light allowed through. Shutter speed determines how long the "valve" is open, and aperture determines how wide. Both together determine how much light gets into your image.
Now we can talk about depth of field.
Your aperture controls the depth of field (DOF). To understand depth of field, think of a straight line extending from your camera's lens to your subject, and then beyond to infinity. As you travel down the line, the closer you get to your point of focus the sharper the focus will become. As you pass beyond your subject, the focus will get softer. The "focal point" is the exact point of perfect focus along the line (i.e. the point at which initially collimated rays of light meet after passing through a convex lens.)
A little of the space in front of the focal point will be in acceptable focus, and comparably more of the space beyond. You can control how thick this in-focus zone will be with the aperture setting. The smaller the aperture number, the smaller the depth of field. A larger aperture number will provide a bigger/thicker zone of acceptable focus. This effect is more pronounced in macro/close up situations.
The amount of DOF you get out of any given aperture setting is increased if your subject is further away, and decreased the closer you are to your lens' minimum focus distance. You have to concern yourself with DOF most when you are very close to your subject. If your subject is relatively farther away, even a wide open aperture can nonetheless provide adequate DOF.
Diving deeper: A very high "stopped down" (i.e. constricted) aperture setting gives the maximum DOF, but yields an overall softer focus. (Of course some lenses are sharper than others. The sharpness depends on the lens.) A "wide open" aperture setting near it's lowest F-stop will provide sharper resolution. The trade off is the lower the F-stop, the less DOF, so it all depends on lens-to-subject distance and the lens you are using. A lens is always sharpest when the aperture is near wide open, and softest when the lens is "stopped down" (constricted) to it's highest aperture setting.
Fine tuning your exposure:
If there is no ambient light in your frame there is no reason to use a slow shutter speed. To expose the ambient-lit areas of the frame, beyond reach of your strobes, the exposure depends on the balance between shutter speed, aperture, and ISO settings.
Choose your ISO setting based on the aperture and shutter speed settings you choose. If the image is too bright, you can a lower ISO. If you halve the ISO number, you cut your camera's sensitivity to light in half (one stop.) Your camera will produce the best images at it's lowest ISO setting. (Some cameras will produce very acceptable images at higher ISO settings. Even so, the higher the ISO the "grainier" the image.)
After you have all the camera settings where you want, the only way to adjust the amount of strobe light in your frame is by adjusting the light-to-subject distance, and/or adjusting the power output.
If you are using shutter speed to control ambient light is gets trickier. Slowing down your shutter speed adds more ambient light, but if the shutter is too slow you can get a blurred image, due to movement. Sometimes this effect is desired. The strobe flash will freeze the parts of the frame lit by the strobe. The ambient-lit parts of the frame might be blurred - a desirable effect.
As a rule of thumb I'd say 1/125th to 1/250th is best for macro, especially when the water is moving and diving conditions are more challenging. Wide angle allows for slower shutter speeds - 60th and possibly 30th. Usually I prefer the fastest shutter speed possible.
Shooting macro, you can set your strobe output high enough to allow a for a higher aperture, and thus achieve good DOF. But remember, a very high aperture setting also means the reduction of ambient light in your frame, and loss of sharpness at the highest settings.

In the photograph at right of the Yellowfin Fringehead Neoclinus stephensae I wanted to show how the bottom dweller uses camouflage to match it's surroundings. Using a wider open aperture tightens the DOF and separates the subject from the background, helping it stand out in the frame. Single strobe, 105mm Nikkor Micro lens (157.5mm equiv.), F11, shutter at 125th, ISO 100.
How to use strobes
Start by turning off your strobes. Adjust your camera aperture so the ambient lit areas of your frame are exposed the way you want. Take several test shots to get the ambient light just right. If possible, point upward to get more natural light in your image. Select the ISO setting you want.
Straight-on light coming from strobes positioned near your lens is flat. Side lighting coming from an angle shows texture and shape.
Strobe light output is controlled two ways. One is to manually adjust the power setting. The other way is to physically adjust the distance between your strobe and subject. (Cut the distance in half, and you quadruple the amount of light. Double the distance, and you reduce it to 25%.) These ratios make using strobe to subject distance a very effective way to control your exposure when shooting close in wide angle or macro.
First use only one strobe. This is your "key light." Typically you'll place it as far left or right as your arms allow. Point directly at the area of your frame you want to emphasize, creating a triangle between your subject, the lens, and strobe. If possible place the sun above and behind your subject. Learn how to shoot with one strobe before using two. Work to get the right balance of ambient light and strobe light. Point your strobe carefully. Target the area you want to light and avoid areas you don't. Resist the temptation of using two strobes until you gain skills using one alone.
A second strobe is pointed at the shadow created by the key light. It is a "fill light" and keeps the shadow areas from being too dark. Make your key light about twice as bright as the fill light - or more. Remember, you WANT shadows! Shadows create a 3D effect and reveal shape and textures. Use the longest arms you can to increase this effect.
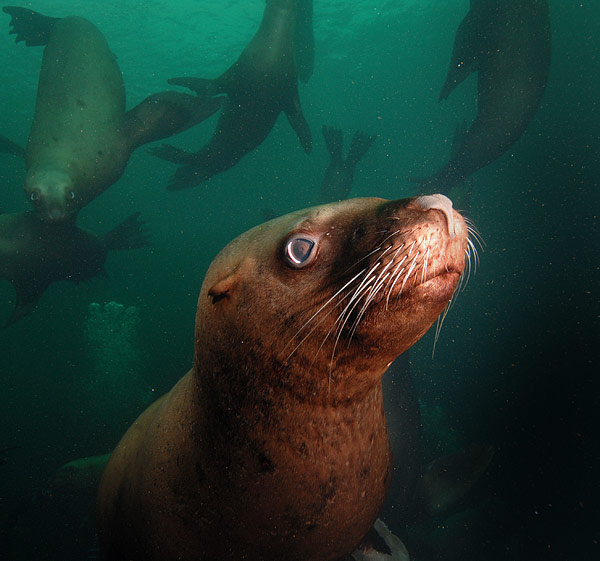
The image below (of juvenile Stellar Sea Lions Eumetopias jubatus at Hornby Island, British Columbia) illustrates the techniques I am writing about. The right side strobe points at the face and is the key light, set at full power. The left side strobe is the fill, set at half power (i.e. one stop below the key light.) The background is ambient sunlight. I pre set up my camera and strobes, and waited for opportunity to arise. Stellars are very curious, and I had many chances to get the shot.
36mm lens F16 125th ISO 200
Underwater photography definitely is not easy, but digital cameras make it easier than the film days. It's my hope this essay helps you grow your skills. My advice is get a big memory card for your camera and shoot, review, adjust, and shoot again, and again, and again. Explore, experiment with light, and take lots of images.
Safe diving! -Ken Ashman
| 
